Follow Me On Social Media!
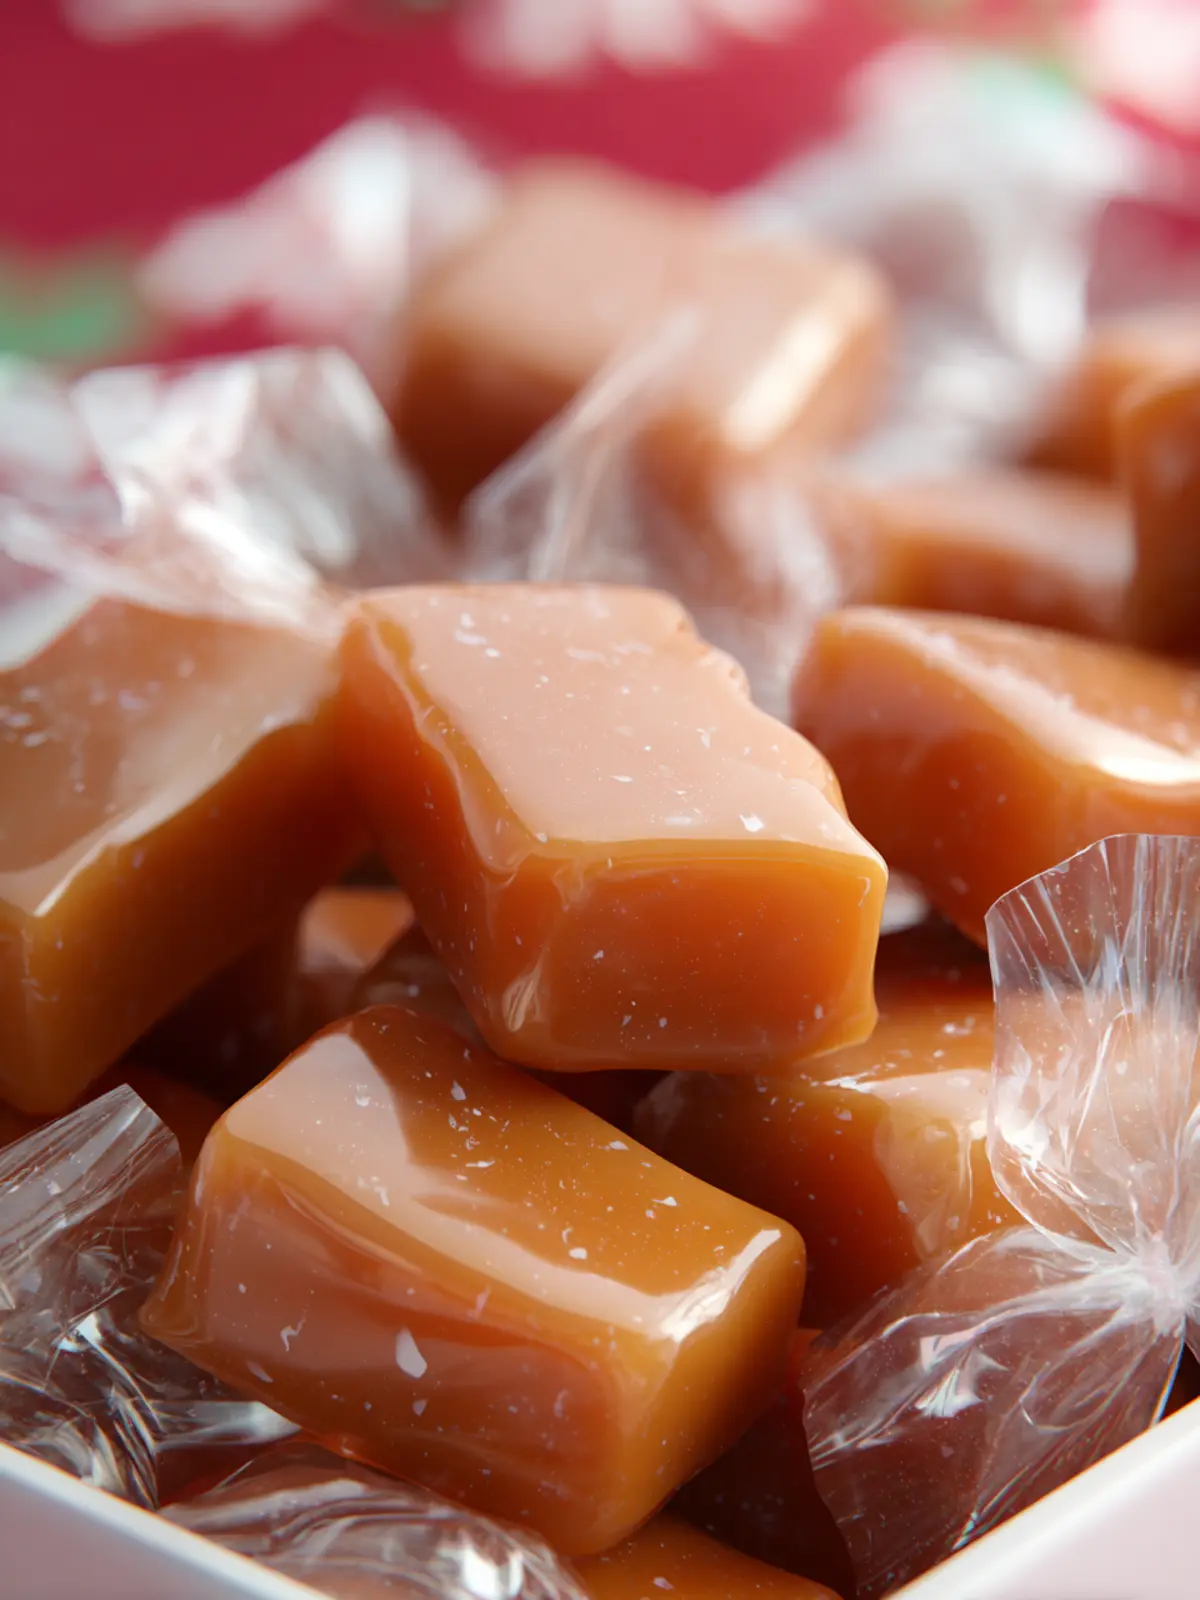
Homemade Caramels: Irresistibly Gooey Delights You’ll Love
Introduction to Homemade Caramels
Imagine standing in your kitchen, the sweet aroma of warm caramel wrapping you in a cozy embrace as it simmers on the stove. The allure of homemade caramels goes beyond mere taste; it’s an experience — one that evokes fond memories of childhood treats and festive gatherings. Making caramels at home allows you to capture that ideal balance of flavors and textures, creating a treat that’s incredibly satisfying both to make and to enjoy.
Homemade caramels have a unique charm that store-bought varieties simply can’t replicate. When you make them from scratch, you gain control over the ingredients, ensuring every bite is rich, buttery, and undeniably delicious. The beauty of these caramels lies in their simplicity; just a few high-quality ingredients come together to create something utterly irresistible.
What makes homemade caramels so irresistible?
The magic of homemade caramels starts with the craftsmanship involved in their creation. Every batch tells a story, from the initial stages of melting sugar to the moment you pour the golden mixture into a prepared pan. Here are a few reasons why these caramels are bound to become your new favorite treat:
- Rich Flavor: The combination of butter and brown sugar creates a deep, rich flavor that lingers on your palate, making you crave just one more piece.
- Melting Texture: There’s something exceptionally satisfying about the way these caramels melt in your mouth. The creamy texture comes from the careful cooking and cooling process you’ll master as you make them.
- Customizable: You can experiment with flavors and mix-ins! Consider adding sea salt for a touch of brightness, or stirring in nuts for added crunch.
Throughout this blog, I’ll walk you through step-by-step instructions to make your own batch of heavenly caramels. Trust me, once you start making these homemade delights, you’ll wonder why you didn’t try them sooner. So, let’s dive into the ingredients and get started on this sweet journey!

Key Ingredients for Homemade Caramels
Crafting homemade caramels is a delightful journey that transforms simple ingredients into sweet, chewy perfection. Each component plays a pivotal role in achieving that rich flavor and smooth texture that we all adore.
-
Granulated Sugar: This is the backbone of your caramel. It not only sweetens but also caramelizes beautifully. Always keep an eye on the sugar as it melts to avoid burning—it can turn from perfect to overdone quickly!
-
Brown Sugar: Adding brown sugar brings a depth of flavor thanks to its molasses content, enriching your caramels with a hint of richness that white sugar just can’t match.
-
Heavy Cream: For that velvety finish, heavy cream is essential. It helps create that luxurious mouthfeel. Be sure to heat it gently before adding to the sugar mixture to prevent any shocking temperature changes.
-
Unsalted Butter: A key player in both flavor and texture, butter gives your caramels that desirable richness. Unsalted is preferred here, allowing you better control over the saltiness of your final product.
-
Salt: A touch of salt balances the sweetness, enhancing the overall flavor profile. Sea salt flakes are particularly wonderful sprinkled on top for a delicious contrast.
With these fundamental ingredients, your homemade caramels will not only impress your taste buds but also become a cherished treat to share with friends and family.
Why You’ll Love This Recipe
When you think of homemade caramels, imagine a sweet moment shared among friends, where the rich, buttery flavor melts in your mouth. These decadent little bites embody comfort and nostalgia, reminiscent of candy shops during your childhood. Making your own caramels isn’t just about crafting a treat; it’s about creating beautiful memories.
Simple and Accessible Ingredients
One of the best aspects of these homemade caramels is that they require ingredients you likely already have. With just sugar, butter, heavy cream, and vanilla, you’ll find that these components come together effortlessly.
A Fun Culinary Adventure
The process of making caramels is as rewarding as the final product. Don’t be surprised if you find yourself captivated by the transformation of simple ingredients into a smooth, gooey delight. Stirring the mixture as it changes color gives a sense of accomplishment that’s hard to match.
Personal Touch
What sets your homemade caramels apart is the heartfelt touch you can add. Whether you want to incorporate sea salt for that perfect sweet-and-salty contrast or infuse flavors like espresso or almond, the possibilities are endless. These caramels can be a personalized gift or a homemade treat that elevates your dessert game. So why not dive in? You’ll love every sticky, sweet moment!

Cooking Tips and Notes for Homemade Caramels
Making homemade caramels can be a wonderfully rewarding experience, especially when you embrace a few key techniques. Crafting caramels isn’t just about melting sugar; it’s about creating a beautiful balance of flavors and textures.
Precision is Key
Homemade caramels thrive on precision. Use a candy thermometer to monitor the temperature closely—aim for around 245°F (118°C) for that perfect soft chewy consistency. If you don’t have one, you can do the cold water test: drop a small amount of caramel into cold water; if it forms a soft ball, you’re good to go!
Patience Pays Off
The secret to silky smooth caramels lies in the cooking process. Stirring constantly can incorporate air, leading to grainy caramels. Let the mixture bubble away undisturbed until it reaches the desired color and consistency.
Choosing Ingredients Wisely
Quality matters. Use unsalted butter for the best flavor, and opt for heavy cream instead of lighter substitutes. The richness will enhance your caramels significantly!
Storage Tips
To enjoy your homemade caramels over time, cool them completely before wrapping. Use parchment paper to prevent sticking. Store in an airtight container in a cool place; they’ll stay soft and chewy for weeks!
With these tips in hand, you’re all set to create some delightful and delicious homemade caramels that your friends and family will love. Happy cooking!
Serving Suggestions for Homemade Caramels
With your delightful homemade caramels all set, dreaming up the best way to serve them becomes the next exciting step. These soft, chewy bites are perfect for sharing or savoring solo, and they can elevate a variety of occasions.
Sweet Treats for Gifting
Consider wrapping your homemade caramels in decorative wax paper, tied with a pretty ribbon. They make for thoughtful, homemade gifts for birthdays, holidays, or housewarming parties.
Pairing with Coffee
There’s nothing quite like enjoying a homemade caramel with a steaming cup of coffee. The mellow bitterness of the brew complements the rich sweetness of the caramel perfectly. You might even consider adding a pinch of sea salt on top for an enticing twist!
Delicious Dessert Enhancements
Add your homemade caramels to dessert plates. A simple scoop of vanilla ice cream topped with a warm caramel drizzle creates a delightful flavor explosion. Trust me—this combination will impress any guest!
Serving homemade caramels can be a creative endeavor. Whether you’re gifting, pairing them with beverages, or enhancing desserts, these caramel delights are sure to bring joy wherever they go.

Time Breakdown for Making Homemade Caramels
Cooking homemade caramels is not just about the sweet rewards; it’s also about savoring the process. By understanding the timing involved, you can set yourself up for caramel success.
Preparation Time
Before diving into the caramel-making fun, set aside about 15 minutes for preparation. This includes gathering your ingredients, measuring everything out, and prepping your pan. A little organization goes a long way!
Cooking Time
The heart of making homemade caramels is the cooking phase, which typically takes around 30 minutes. You’ll need to keep a close eye on the mixture to ensure it reaches that perfect golden color and the desired temperature.
Cooling Time
After cooking, patience is key! Allow the caramels to cool completely in their pan for at least 1 hour. This step is crucial for achieving that chewy texture we all love. Once cooled, you can slice and enjoy your delectable homemade caramels.
Nutritional Facts for Homemade Caramels
Creating homemade caramels not only brings joy to your kitchen but also offers a peek into what you’re indulging in. These delightful treats are rich and sweet, making them a popular choice for sharing or enjoying yourself.
Calories
Each piece of homemade caramel packs around 40 calories. If you’re counting, it’s good to enjoy these treats in moderation, as those calories can add up quickly!
Sugar
A significant aspect of these caramels is the sweetness. Each piece contains approximately 6 grams of sugar, derived from the sugars used in the recipe, which adds to their melt-in-your-mouth texture and delightful flavor.
Fat
You’ll find that each caramel has about 1.5 grams of fat, primarily coming from butter. This little bit of richness is what makes homemade caramels so satisfying, balancing the sweetness beautifully. Enjoy with mindfulness, and savor the decadence!
FAQ about Homemade Caramels
When you decide to embark on the delightful journey of making homemade caramels, questions naturally arise. This sweet candy can be deceptively simple, yet mastering it brings immense satisfaction. Here are some frequently asked questions to help you navigate any caramel-making conundrums.
How do I know when my caramels are done?
The perfect texture is essential for homemade caramels. To ensure they’re done, you should aim for a temperature of 245°F (118°C) on a candy thermometer. If you don’t have one, a quick test involves dropping a small spoonful of the caramel into cold water. If it forms a soft ball that you can squish but not flatten, you’re good to go!
What should I do if my caramels are too soft?
If your homemade caramels turned out softer than expected, don’t worry! Simply return the mixture to the stovetop, reheat it, and cook it for a few more minutes until it reaches the right temperature. Alternatively, you could pour the mixture into a small pan and refrigerate it to set for a bit longer.
Can I flavor my caramels differently?
Absolutely! You can easily customize your homemade caramels by adding flavors. Consider incorporating vanilla extract, sea salt, or even espresso powder for a unique twist. For fruitier notes, a splash of citrus juice or extract works wonders. Just remember to add these flavors at the end of cooking to preserve their vibrant essence.
With these tips, you’re well-equipped to create mouthwatering homemade caramels that will impress friends and family alike. Happy candy-making!
Conclusion on Homemade Caramels
Creating homemade caramels is a delightful journey that combines simplicity and indulgence. With just a few pantry staples—sugar, butter, cream, and vanilla—you can craft sweet, chewy treats that elevate any dessert or serve as a stand-alone snack. Whether you gift them to friends or savor them yourself, these caramels are bound to become a cherished favorite.
Remember, the key to achieving that perfect texture lies in patience and precision. As you experiment and perfect your technique, these homemade caramels will surely become a delicious staple in your kitchen!
Print
Creamy Butter Candy
- Total Time: 45 minutes
- Yield: 24 pieces 1x
- Diet: None
Description
A rich and creamy butter candy that melts in your mouth.
Ingredients
Scale
- 1 cup + 1 tbsp Butter
- 1 1/4 cups Sugar
- 1 1/4 cups Brown Sugar
- 1 cup Corn Syrup
- 2 cups Heavy Whipping Cream
- 1 tsp Vanilla
Instructions
- Line a 9 x 13 pan with aluminum foil. Use entire 1 tbsp butter to grease the foil.
- In a large, deep sauce pan over medium heat combine 1 cup butter, sugars, corn syrup, and 1 cup heavy cream.
- Stir constantly until sugar is dissolved and butter is melted. Bring to a boil, but not a rolling boil.
- Slowly stir in additional 1 cup heavy cream.
- Cook without stirring until candy thermometer reads 240 degrees.
- Remove from heat and stir in vanilla.
- Pour into prepared pan. Do not scrape sides of the sauce pan where crystals have formed. Scraping bottom and partial sides to get remaining liquid is okay.
- Let stand until firm.
- Lift out of the pan and peel foil off. Cut into oblong pieces, wrap individually in waxed paper or candy foils, and twist ends to close.
Notes
- This candy can be stored in an airtight container at room temperature for up to two weeks.
- Ensure that the candy thermometer is accurate for the best results.
- Prep Time: 15 minutes
- Cook Time: 30 minutes
- Category: Desserts
- Method: Stovetop
- Cuisine: American
Nutrition
- Serving Size: 1 piece
- Calories: 150
- Sugar: 20g
- Sodium: 10mg
- Fat: 8g
- Saturated Fat: 5g
- Unsaturated Fat: 2g
- Trans Fat: 0g
- Carbohydrates: 20g
- Fiber: 0g
- Protein: 0g
- Cholesterol: 30mg