Follow Me On Social Media!
Reverse Sear Prime Rib: Irresistibly Juicy Perfection at Home
Introduction to Reverse Sear Prime Rib
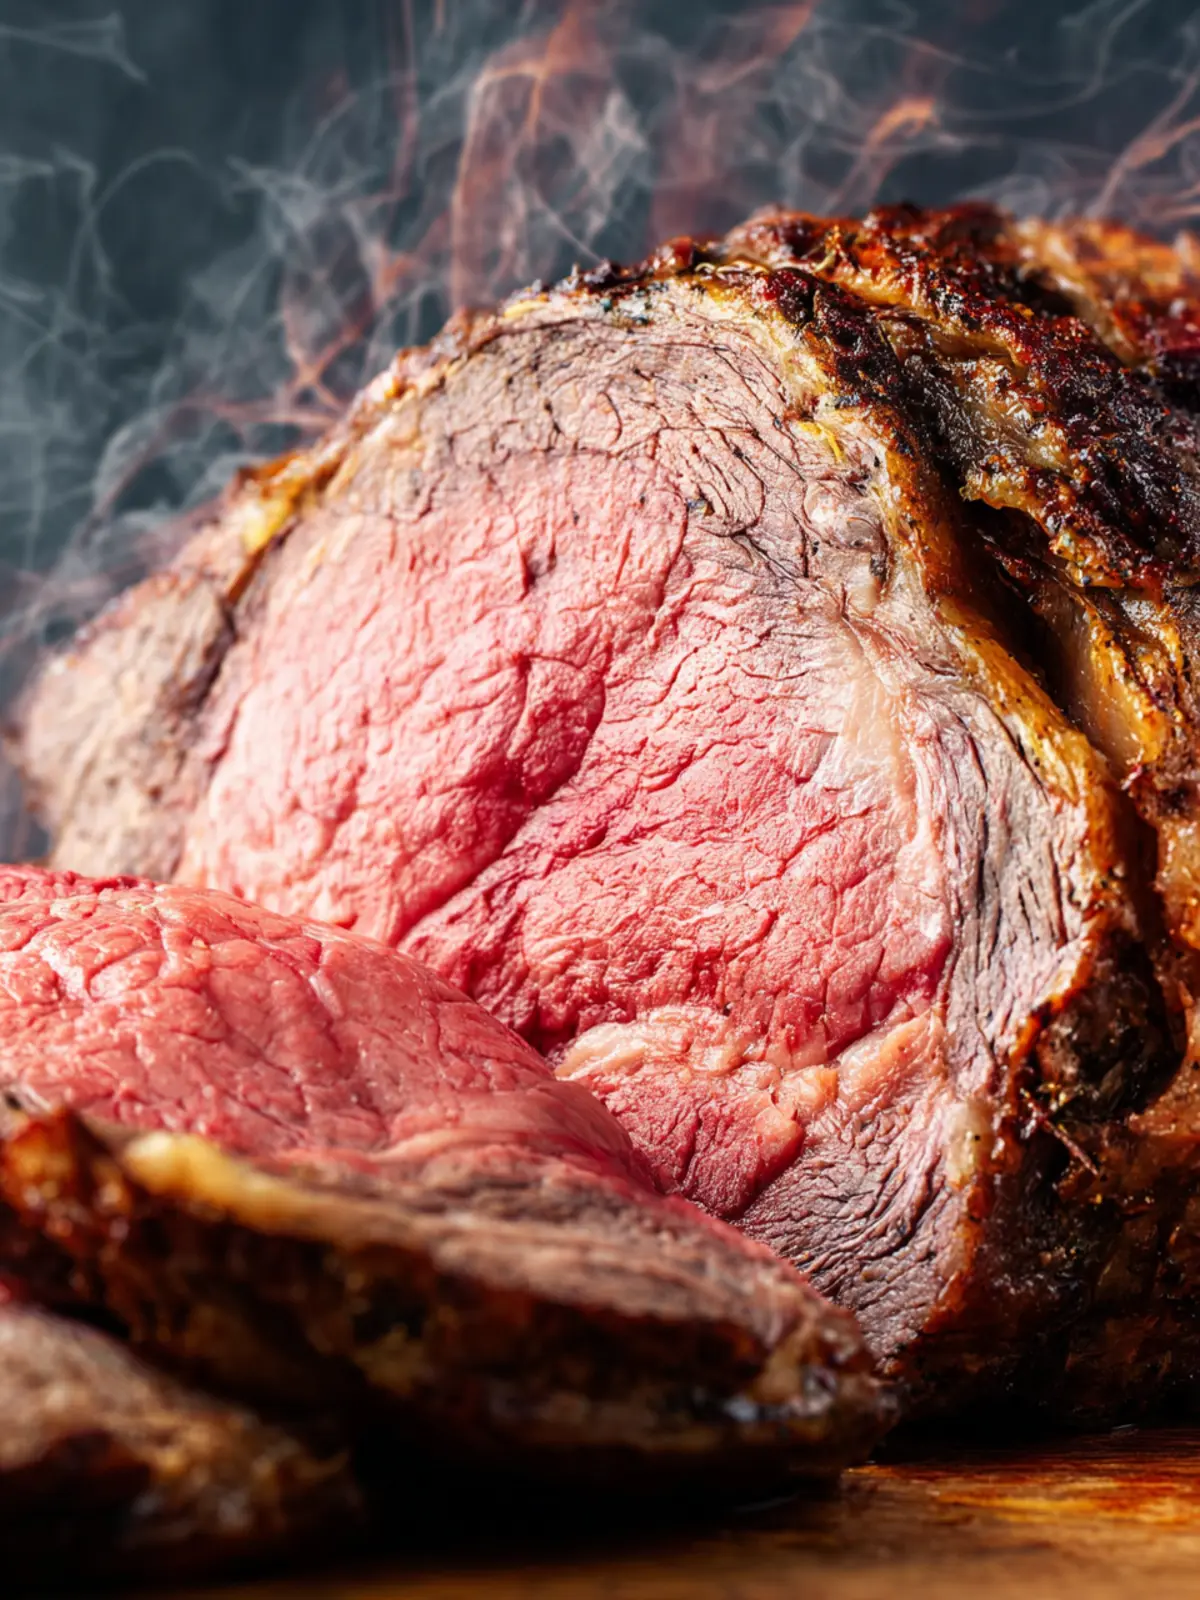
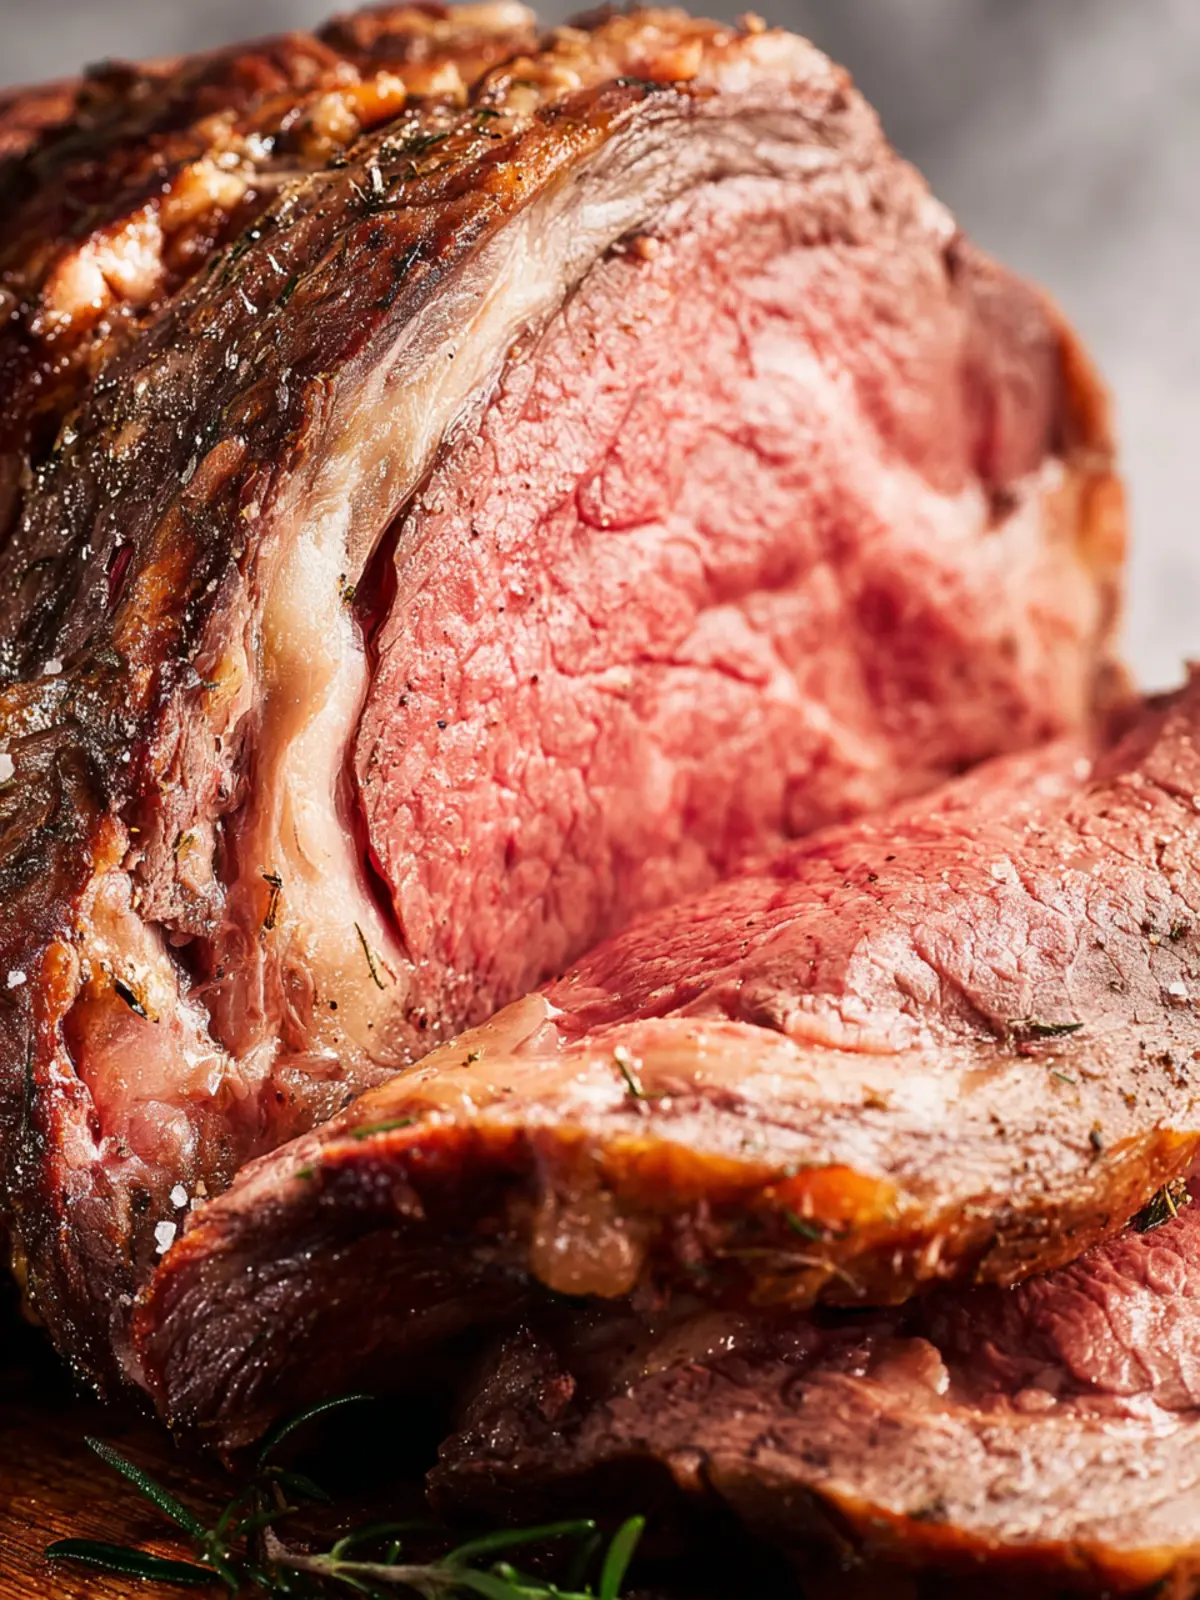
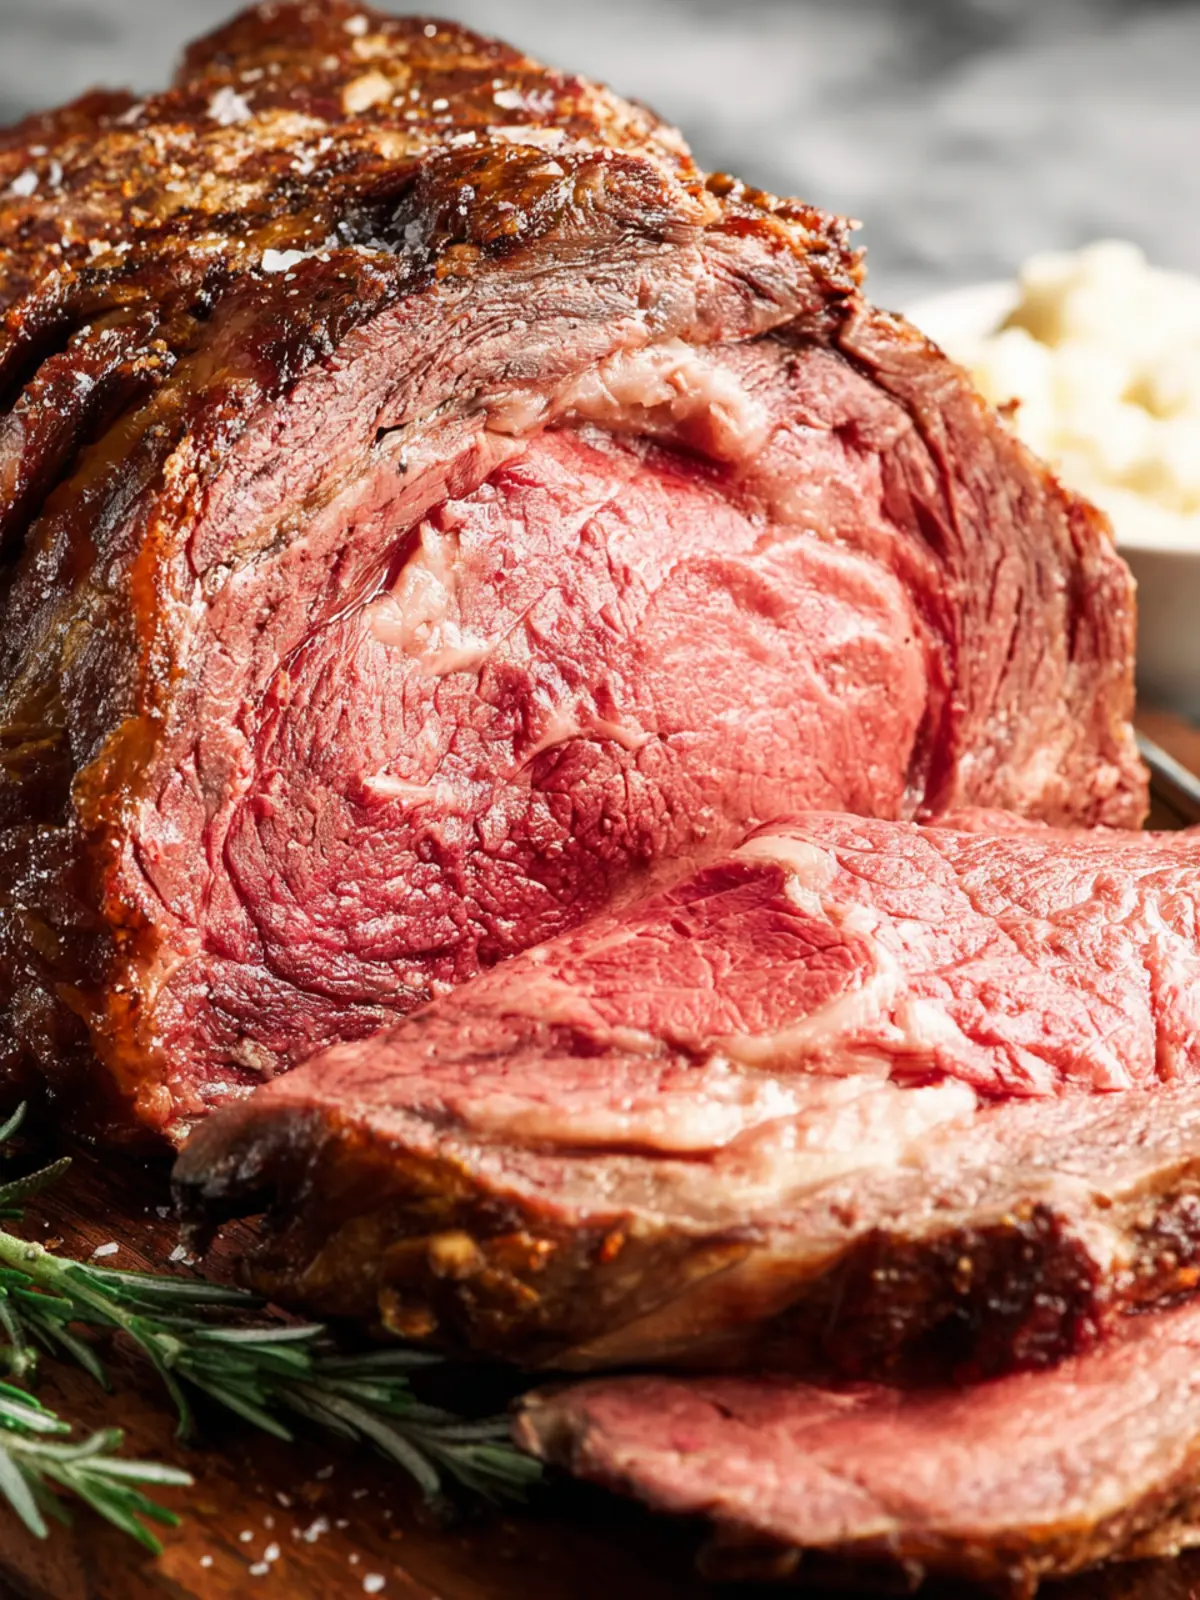
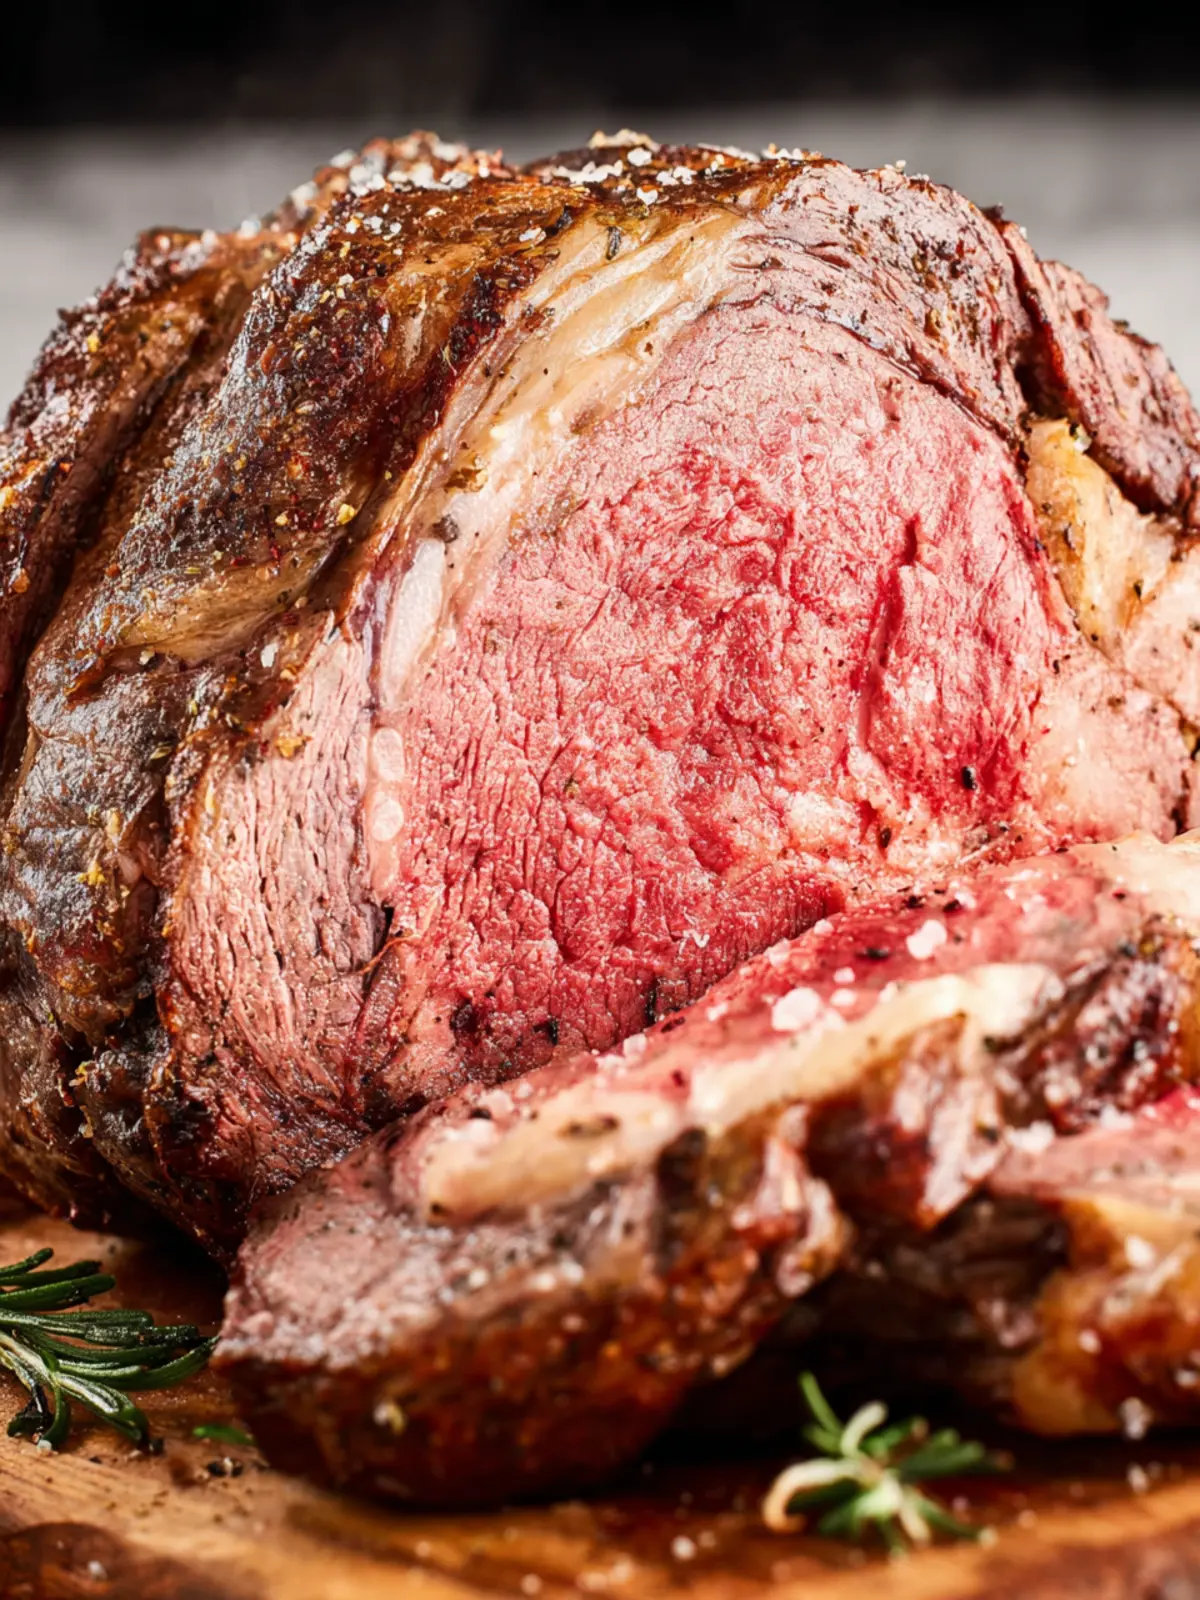
Unleashing the sumptuous flavors of a reverse sear prime rib transforms any ordinary meal into a culinary celebration, especially if you’re someone who savors the balancing act of crispy exteriors and perfectly tender interiors. Imagine inviting friends over for dinner and presenting a roast that glistens with juiciness, complemented by a crust so savory it begs to be savored with each bite. This method elevates the cooking experience and ensures that your prime rib is always tender and mouthwatering.
The allure of perfectly cooked prime rib lies in its visual appeal and rich flavor profile. With a reverence for quality and taste, a well-cooked prime rib offers a melt-in-your-mouth experience that lingers long after the last bite. Not only is the reverse sear technique gaining a loyal following among home cooks, but it also catches the attention of culinary professionals. The secret? This cooking method allows you to slowly bring the meat to temperature before finishing it off with a high-temperature sear, resulting in an incredibly juicy interior surrounded by a delightful crust.
What sets the reverse sear prime rib apart is the finesse involved in its preparation:
- Even Cooking: By starting at a lower temperature, the meat cooks evenly, preventing the common mistake of overcooking the outer layers while waiting for the center to reach perfection.
- Controlled Searing: After achieving the desired doneness, the sear creates a caramelized exterior that adds layers of flavor and visual appeal.
- Juiciness Retention: The lower cooking temperature minimizes moisture loss, leading to an incredibly juicy end result that’s a testament to your culinary skills.
As we dive deeper into the delightful world of roasting and savoring prime rib, you’ll find the joy in mastering this technique. It’s not just about following instructions—it’s about creating an experience around the meal that you and your guests will talk about for years to come. So let’s get started on this delicious journey into the art of crafting the ultimate reverse sear prime rib.
Key Ingredients for Reverse Sear Prime Rib
Prime Rib: The star of the show, prime rib boasts a flavorful marbling that melts into juicy perfection as it cooks. Look for a well-marbled cut, ideally bone-in, for that extra depth of flavor.
Kosher Salt: Generously seasoning the meat with kosher salt is crucial. It enhances flavor and helps the steak retain its natural juices, creating a succulent bite that melts in your mouth.
Black Pepper: Freshly cracked black pepper adds a hint of spice that beautifully complements the rich beefiness. This simple seasoning takes your roast to the next level.
Garlic: For an aromatic twist, incorporating minced garlic adds depth without overpowering the natural flavors. Roasting the garlic alongside the meat creates a savory aroma that fills your kitchen.
Herbs: Fresh rosemary and thyme provide an earthy fragrance that pairs excellently with the beef. Toss these herbs in during the cooking process for an aromatic infusion.
Oven and Grill: While not ingredients in the traditional sense, having a reliable oven and grill is essential for achieving that coveted reverse sear crust. This cooking method allows for an even cook and an irresistible crust, elevating your prime rib game!
Why You’ll Love This Reverse Sear Prime Rib
A show-stopping centerpiece for dinner
The reverse sear prime rib method transforms this classic dish into a culinary triumph that is sure to impress your guests. Imagine gathering around a beautifully cooked roast, its exterior perfectly browned and the aroma wafting through your home. This technique allows for even cooking and a delectable crust, making every bite juicy and tender.
Instead of worrying about overcooking your prized rib, the reverse sear technique takes the stress out of the cooking process. You start by slowly cooking the prime rib at a low temperature, ensuring it reaches an even internal doneness. Once it’s close to perfect, you finish it off with a high-heat sear that creates that irresistible crust. The result? A prime rib that’s not only visually stunning but also mouthwateringly delicious.
What’s more, serving a reverse sear prime rib at your dinner table fosters a communal vibe. You’ll find your friends and family gathering around, sharing stories and laughter, all while savoring the rich flavors of this perfectly cooked roast. It’s more than just a meal; it’s an experience, and that’s something worth celebrating.
Tips for Making Perfect Reverse Sear Prime Rib
Preparing the reverse sear prime rib is a culinary adventure that rewards patience and attention to detail. With the right approach, it’s simple to achieve that melt-in-your-mouth texture and impressive crust. Here are critical steps to ensure success.
Critical Steps to Ensure Success
-
Get the Right Cut: Start with a quality cut of prime rib, ideally a bone-in roast for added flavor. Look for good marbling, as this will enhance juiciness and tenderness.
-
Choose Your Cooking Method: The reverse sear method involves cooking the rib roast at a lower temperature, then searing it. Use an oven-safe meat thermometer for precision; this will help avoid overcooking.
-
Patience is Key: After cooking the prime rib at a low temperature, let it rest. This will redistribute the juices and keep the meat from drying out. A rest of at least 30 minutes will yield the best results.
-
Timing the Sear: Once rested, sear the prime rib on high heat; you want a golden-brown crust for flavor. Don’t rush this process – a proper sear can take 10-15 minutes.
-
Slice Carefully: When it’s time to serve, use a sharp knife to slice against the grain. This ensures each bite is tender and easy to chew.
By following these essential tips, your reverse sear prime rib will shine as the centerpiece of any gathering. Enjoy the process, and let every step lead to a dinner everyone will remember.
Time Details for Reverse Sear Prime Rib
When planning for a delightful reverse sear prime rib, having the right timing is essential to achieve that perfect melt-in-your-mouth experience. Here’s a breakdown to help you organize your cooking process seamlessly.
Preparation Time
This stage takes about 30 minutes. It includes seasoning the prime rib and letting it rest to reach room temperature before cooking.
Cooking Time
Expect around 2 to 2.5 hours for the entire reverse sear process. This involves low-temperature roasting followed by a short, high-temperature sear to create that beautiful crust.
Total Time
In total, you’re looking at approximately 2.5 to 3 hours from start to finish, allowing for a relaxed pace to enjoy the cooking experience and share moments with loved ones around the kitchen.
Nutritional Information for Reverse Sear Prime Rib
Understanding the nutritional profile of reverse sear prime rib can help you enjoy this indulgent dish guilt-free. Prime rib is not just a treat for special occasions; it can be a nourishing part of a balanced diet when consumed in moderation.
Calories
A typical serving of reverse sear prime rib contains around 350-450 calories. This rich cut of beef is satisfying and filling, providing energy while still being a special treat for gatherings.
Protein
The star of the show, this cut of beef packs a protein punch, delivering about 25-30 grams of protein per serving. This high protein content is perfect for maintaining muscle mass and feeling satiated, especially after a hearty meal.
Sodium
One thing to note is the sodium content. A serving of reverse sear prime rib can have about 700-800 mg of sodium, depending on the seasoning and preparation methods. While this could be high for some, it’s essential to balance it within your overall daily intake, especially if you’re mindful of sodium levels in your diet.
Enjoying a deliciously cooked reverse sear prime rib doesn’t just mean savoring fantastic flavors; it also means being conscious of its nutritional benefits!
FAQs about Reverse Sear Prime Rib
Reverse searing your prime rib takes a classic dish and gives it a new twist, perfect for gatherings and special occasions. Let’s dive into some commonly asked questions to help you create the ultimate reverse sear prime rib experience.
How do you achieve the perfect crust?
Creating that perfect crust on your reverse sear prime rib comes down to a few key steps:
- High Oven Temperature: After slow cooking your rib at a low temperature, a blast of high heat (around 500°F) creates a beautifully caramelized exterior.
- Resting Time: Allowing your meat to rest for 15-30 minutes after cooking lets the juices redistribute, ensuring a tender bite.
- Drying the Surface: Pat your prime rib dry with a paper towel before searing. A dry surface is crucial for that coveted crust.
Can you use other cuts of meat?
Absolutely! While prime rib is a classic choice, the reverse searing method works beautifully with:
- Ribeye Steak: For a smaller option, ribeye offers fantastic marbling.
- Tomahawk Steak: The impressive presentation makes it perfect for special occasions.
- Pork Loin or Tenderloin: These cuts benefit from a similar low-and-slow cooking technique followed by high-heat searing.
What are the best side dishes to serve with prime rib?
Pairing side dishes with your reverse sear prime rib can elevate your meal. Consider these delightful options:
- Garlic Mashed Potatoes: Creamy and flavorful, they complement the rich meat.
- Roasted Vegetables: Seasonal veggies like carrots or Brussels sprouts balance the meal.
- Yorkshire Pudding: A traditional favorite to soak up the juices.
With these FAQs in mind, you’re well-equipped to create a perfect reverse sear prime rib feast!
Conclusion on Reverse Sear Prime Rib
In the quest for the perfect prime rib, the reverse sear technique shines as a game-changer. This method ensures that your meat is evenly cooked, resulting in a tender and juicy centerpiece that impresses at any gathering. When the final touch is a quick sear in the oven or on the grill, you get a beautiful crust that enhances both flavor and texture.
Whether it’s a festive holiday dinner or a casual weekend gathering, serving a perfectly cooked reverse sear prime rib not only showcases your culinary skills but also the time and care you put into your dishes. Your guests will surely remember this delicious meal!
Print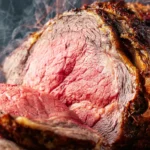
Perfect Standing Rib Roast
- Total Time: 30 hours
- Yield: 8-10 servings 1x
- Diet: Meat-based
Description
This standing rib roast is an impressive dish that requires some planning but yields incredible results.
Ingredients
Scale
- 1 (6-pound) bone-in standing rib roast (fat trimmed to about 1/2 inch)
- to taste kosher salt
- to taste freshly ground black pepper
- 4 tablespoons unsalted butter (softened)
- to taste fresh rosemary and/or thyme
Instructions
- Before You Begin: This recipe is mostly hands-off, but it does need a little planning ahead. Please take a moment to read through the steps so you can give the roast the time it needs. Ideally, season the roast 24 hours ahead for the best flavor and texture. Allow for about 2 hours resting at room temperature before cooking, which will take 3–4 hours depending on oven temperature and roast size. A long rest (30–60 minutes) happens before the final sear, which is quick (5–10 minutes), followed by a short rest before slicing.
- Seasoning: Generously season the rib roast on all sides with kosher salt 24 hours before cooking. Place the roast on a rack over a baking sheet and refrigerate loosely covered to allow the surface to dry and the salt to penetrate deeply into the meat.
- Preparation Before Roasting: Remove the roast from the refrigerator around 2 hours before cooking to allow it to come to room temperature. Optionally, mix the softened butter with freshly ground black pepper and herbs, and slather it evenly over the roast. If not using butter, simply season the roast generously with black pepper.
- Prepare for Roasting: Preheat the oven to 200°F–225°F. Place the roast fat side up on a roasting rack set in a large roasting pan, or on a wire rack inside a rimmed baking sheet. Insert a meat thermometer into the thickest center portion of the roast, avoiding the bone.
- Low-Temperature Slow Roast: Roast until the internal temperature reaches a comfortable level for you, which refers to when the roast is removed from the low-temperature oven before the final high-heat sear. For rare, pull at 120–125°F; medium-rare at 130°F; medium at 135°F; USDA recommended minimum at 145°F. At 225°F, cook for about 30 minutes per pound; at 200°F, about 30–45 minutes per pound. Total cook time will typically be 3 to 4 hours, but always rely on temperature, not the clock.
- Resting: Remove the roast from the oven and tent it lightly with foil. Let it rest at room temperature for 30 to 60 minutes, allowing juices to redistribute.
- High-Temperature Searing: Increase the oven temperature to 450-500°F. This step can produce smoke, so take precautions as needed. If excessive fat collects in the roasting pan, transfer the roast to a clean pan to minimize smoking. Once fully preheated, return the roast to the oven and sear for 5 to 8 minutes, just until a deep brown crust forms.
- Final Rest and Serving: Remove the roast from the oven and let it rest for a few minutes. Carve into slices and serve immediately.
Notes
- Planning is essential for this recipe to achieve the best flavor and texture.
- Consider variations in cook times based on the size of your roast.
- Remember to allow sufficient time for resting before serving.
- Prep Time: 24 hours
- Cook Time: 3-4 hours
- Category: Main Course
- Method: Roasting
- Cuisine: American
Nutrition
- Serving Size: 1 slice